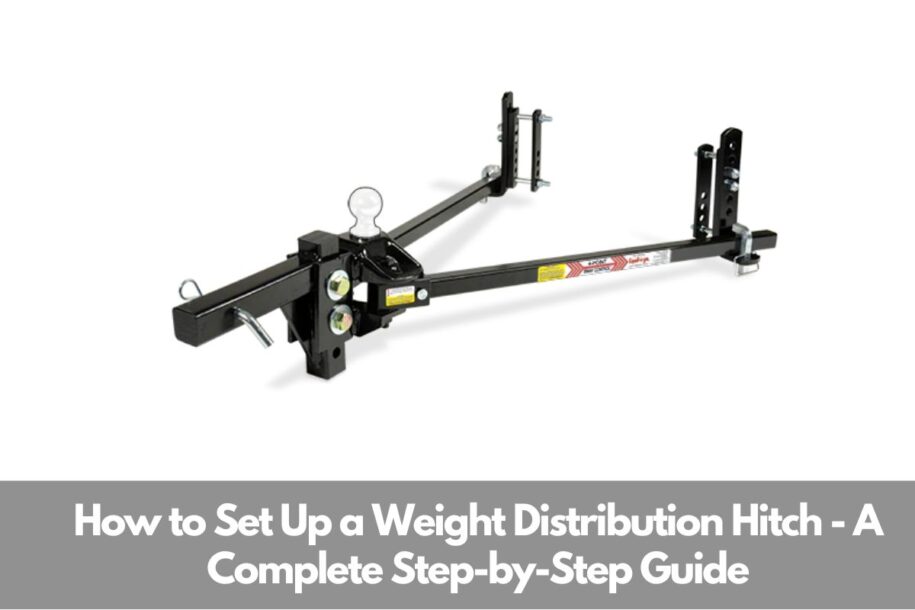
Properly installing and adjusting a weight distribution (WD) hitch is critical for safe towing and ideal trailer handling. Correct setup helps transfer weight to the front axle, leveling out the vehicles, and reducing sway.
This in-depth guide covers the entire process for optimizing your weight distribution hitch:
Why Weight Distribution Matters
Weight distribution involves transferring weight from the rear trailer axle forwards to the tow vehicle front axle. This provides:
- Improved front steering responsiveness
- Better braking control
- Reduced sag on rear suspension
- Lower trailer sway tendencies
- Even tread wear across tires
Together this gives much greater towing stability and safety.
Weight Distribution System Components
A complete weight distribution setup includes:
- Hitch head that fits your receiver
- Adjustable ball mount to set trailer height
- Trailer spring bars that connect hitch head to trailer
- Spring bar snap-up brackets and chains
- Sway control friction pads built into hitch head
Quality bars allow fine tuning weight transfer. Adjustments optimize the system for your vehicles.
Step 1: Park on Level Ground
The tow vehicle and trailer must sit as level as possible during setup. This neutral position simplifies adjustment.
- Park the trucks on level solid ground
- Chock trailer tires to prevent rolling
- Disconnect trailer from tow vehicle
Step 2: Measure Pin Box Height
Knowing the exact trailer coupler height dictates ball mount requirements:
- Measure from the ground up to the underside of the coupler
- Record this pin box height dimension
Step 3: Measure Hitch Receiver Height
The ball mount must match receiver height to pin box height:
- Measure from the ground up to the inside top of the empty hitch receiver
- Compare receiver height to recorded pin box height
Step 4: Select Proper Ball Mount
Choose a mount with necessary drop or rise to align the receiver and pin box heights:
- Drop configurations lower the trailer coupler
- Risers lift the trailer tongue higher
- Mount should be as close to level as possible under load
Step 5: Insert Ball Mount into Hitch
Install the height-adjusted ball mount into the receiver:
- Insert into receiver tube at proper rise/drop orientation
- Install clip and pin to secure the mount through holes
- Tighten pin snugly to prevent noise
Step 6: Attach Trailer Ball
Mount the proper sized trailer ball for your coupler:
- Slide ball shank into ball mount hole
- Tighten ball nut securely against mount
- Ensure ball is tight – no play or wobble
Step 7: Attach Spring Bars
Now connect the spring bars from the trailer brackets to the hitch head:
- Insert bar ends into hitch head receiver holes
- Clip retainer pins through bars to secure in place
- Loosen bar adjusters allowing full slide movement
Step 8: Lift Trailer Tongue
Use the trailer front jack to raise the coupler about 2 inches above final height. This allows load transfer room.
Step 9: Position Vehicle and Connect Trailer
- Back tow vehicle until coupler is centered directly over ball
- Lower jack to settle coupler fully onto ball while applying pressure
- Engage coupler locking mechanism
Step 10: Attach Spring Bar Chains
Connect each spring bar chain hook to the brackets mounted on the trailer A-frame:
- Leave ample slack in chains initially
Step 11: Adjust Sway Control Friction
Tighten sway control bolts evenly to compress pads against ball. This adds sway damping.
- Do not overtighten – allow some pivoting motion
Step 12: Tighten Chains to Adjust Weight Distribution
- Progressively tighten chains to raise front of trailer and tow vehicle
- Adjust until both trailer and tow vehicle are level front to back
- Road test and make final small tune-ups
Carefully adjusting spring bar angles and chain tension optimizes the hitch for your particular rig. Tow safely knowing the trailer weight is distributed properly.
Troubleshooting Hitch Adjustment Issues
If trailer sway or instability persists, try tweaking adjustments:
Rear vehicle sagging – Increase spring bar chain tension to transfer more weight forward
Front vehicle riding too high – Loosen chains somewhat to reduce front axle lift
Trailer swaying – Ensure bars are tight enough to adequately damp sway forces
Rough noisy ride – Slightly reduce chain tension if too harsh
Trailer too low in front – Tighten chains more to level trailer orientation
Take the time to fine tune the hitch perfectly. Consider consulting a professional if struggling with the learning curve. Correct setup greatly improves towing safety and response.
Weight Distribution Hitch Maintenance
Keep your system operating smoothly with:
- Monthly cleaning and lubricating chains, spring bars, brackets
- Check bolts/welds for damage or cracking
- Replace any worn parts – bent bars, elongated brackets, damaged friction pads
- Touch up scratches/nicks in steel parts to prevent rust
- Verify chains remain tightened to specified torque values
Proper hitch care and setup means years of reliable service for safe towing. Follow the step-by-step guide provided here each time to optimize the weight distribution on your rig.

